6 REAL Reasons Why You Need A Mobile-Optimized Website
We’ve all heard the saying, “If you build it, they will come.” But what about that other saying: “If you build it right, they&...
If you’re in the business world, whether you’re a startup founder, investor, or just someone looking to expand your network, Crunchbase is your go-to platform. It’s a powerhouse of information on companies, funding rounds, investors, and industry trends. But here’s the deal: to truly unlock its potential, you need to set up your Crunchbase profile the right way.
In this blog, I’ll guide you through how to set up Crunchbase like a pro and make your company or personal brand stand out to investors, partners, and the global startup community.
Crunchbase isn’t just a data repository. It’s the directory for anyone serious about the business ecosystem. With over 75 million users annually, it’s where people look to research companies, track funding rounds, and discover new business opportunities.
So, whether you’re looking for investors, partners, talent, or visibility, this is where you want to shine.

First things first:
Head over to Crunchbase.com.
Click “Join” in the top right corner.
You can sign up using Google, LinkedIn, or your email.
Choose the free account to start with (you can always upgrade later).
Pro Tip: If you’re planning to do serious market research or competitor analysis, consider upgrading to Crunchbase Pro. It gives you advanced search filters, personalized alerts, and access to more data insights.
Here’s where the magic starts.
Once logged in, search for your company name in the Crunchbase search bar.
If your company already exists (created by someone else or auto-generated), you’ll see it. Click it and select “Claim this profile”.
Click Resources in the top navigation, then Create Profile.
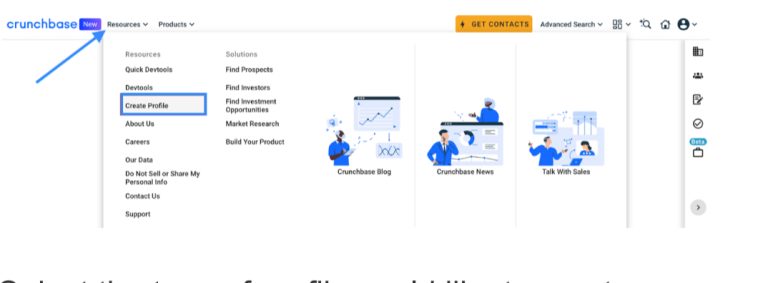
4. Select the type of profile you’d like to create.

5. Enter the profile details that you wish to be included, then click Save All Edits in the upper right corner of the profile when you are finished.If your company isn’t listed, no worries! Click “Add new profile” and select “Organization”

This is your company’s chance to shine—so don’t hold back!
Company Name: Make sure it’s exactly how your customers recognize you.
Description: Write a concise, engaging summary of what your company does. Think of it as your elevator pitch.
Website & Social Links: Add your company website, LinkedIn, Twitter, and any other relevant social profiles.
Headquarters Location: Specify your primary office location.
Industry Tags: Choose the right tags that best describe your business (e.g., SaaS, Fintech, AI, Healthcare).
Pro Tip: The more complete your profile, the higher the chances it’ll show up in relevant searches.
People love to know who is behind a company.
Scroll down to the “People” section and add key executives, founders, and board members.
If your personal profile doesn’t exist yet, you can create one too!
This helps build credibility and shows the world the brains behind the brand.
If your company has raised funding:
Navigate to the “Funding Rounds” section.
Click “Add funding round”.
Enter the details: funding type (Seed, Series A, etc.), date, amount raised, lead investors, and any other participants.
This step is crucial for visibility—investors, journalists, and potential partners often filter companies based on funding data.
Add your company logo and any relevant media like product images, team photos, or videos.
A sharp, high-resolution logo makes your profile instantly recognizable.
Complete your company profile to maximize your appearance in search results and improve your Crunchbase Rank.
Once the new profile is created, you can always edit its details by clicking Actions in the upper right corner, then select Edit from the dropdown.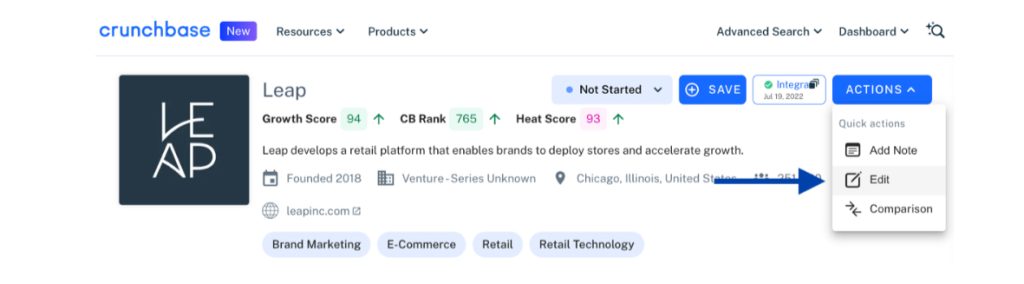
Your Crunchbase profile isn’t a “set it and forget it” kind of thing. Keep it updated with:
New funding rounds
Partnerships or acquisitions
New product launches
Leadership changes
This keeps your company top-of-mind for investors and potential collaborators.
Once your profile is up and running, you might want to dive deeper into Crunchbase Pro. It offers:
Advanced search filters (find companies by industry, funding, location, etc.).
Personalized alerts on companies, funding rounds, or sectors you care about.
Competitive analysis tools.
If you’re serious about networking or tracking market trends, the Pro features are a game-changer.
Setting up your Crunchbase profile properly is an investment in your company’s visibility and credibility. In today’s fast-moving business world, being discoverable is half the battle.
So, take the time to craft a compelling profile. Show the world who you are, what you do, and why they should care. Whether you’re seeking funding, partnerships, or just aiming to boost your brand presence, Crunchbase can open doors.
Now, go claim your digital real estate and let Crunchbase work its magic!